Makeup Exploration


Arm Veins
Face Veins


I sculpted a series of circuit lines in relationship to the arm veins. I decided to make them all in line at the top, where the wrist ends and hands begins. Mainly as the silicone piece would crease and be more apparent if applied at the joint but also to create a more robotic/man made appearance.
I used a clay extruder as it allowed all the lines to come out at the same width, which resembles a circuit board. The images on the right, show veins on the left that have been blended into the surrounding clay on the ones on the right which have not. It shows how they need to be blended in, in order to produce the appearance of being under the skin rather than placed ontop.
These two photographs show the finished sculpt, flashing and wall ready to mould. I made sure that the edges were very thin so that the piece will blend in nicely to the skin. Also i had the circuit lines fade out at the bottom to create the illusion that they are going deaper into the body.
In order for the sculpt to fit the model, a face cast is required.
-
Prep the model - make sure skin is clean, model has had a briefing and understands what is going to happen, wearing old clothes and a bin liner to stop any of the materials from sticking on any clothing, any hair has been vaselined.
-
Apply the alginate - adding equal parts of water to the alginate, mix thoroughly, apply starting at the top of the head, leave the nose area to last and apply alginate using a tool for precision, make sure that all the face area that is required its covered, make sure that there is an even coverage.
-
Apply the mud rock - make a rope-like bond aroundthe edge of the face cast, apply strips across the face being careful the nose holes, make sure there is an even and strong coverage.
-
Fill up with plaster - make sure the nose holes have been blocked up and some plaster bandage has been applied across the nose on the other side, lean the cast in a bowl to stop it from moving around, mix up the plaster and pour into the cast, then leave to set.
-
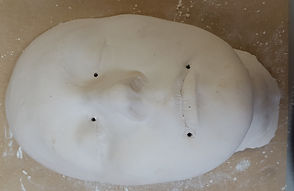
I smoothed down any areas of extra plaster from air bubbles and also took away the eyebrow hair detail. The right eye area did not cast as precisly as i would have liked, however as i will not be sculpting at this area, it will not be an issue. I used photographs and the other eye as reference to reshape it.
The outcome was very successful and was a clear replica of my model. I feel that i have improve with in my life casting skills and feel more prepared to create a full head cast and use silicone casting material instead of alginate. This will allow me to cast multiple times and also fibreglass straight into the silicone, which will enable me to create negative fibreglass moulds of my sculpts.
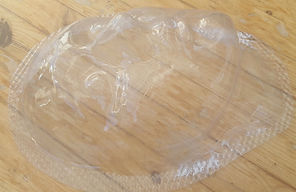
I decided to take a vaccum form of my face cast, just in case it was to get broken or if i wish to create a fibreglass mould within this project. Holes are required in order for the plastic to reach into lower/undercut areas.
-
As the drill bits are not long enough to go through the plaster head, i had to cut some alluminium at an angle and then place that into the drill.
-
As it is weaker, less pressure and speed needs to be applied when drilling the holes.
-
I made the holes were it would not effect any sculpture work and in areas where the air needs to exit in order to pull the plastic tight against the form. this included the inner corners of the eyes and outer corners of the lips.
-
Once ready I placed the face into the vaccum form, heated the plastic for 45 minutes than estracted the air.
I also decided to mount the plaster head onto a board so that it will make it more secure and sit more evenly on a surface. Also my cast was slightly wonky, as the alginate had been applied slightly further back on one side of the face. To correct this i placed a piece on wood in the centre and buit up one side with clay to create an even angle for the face to lay on.
From my last project, i discovered that dry plaster does not stick firmly to new plaster. So before mounting, i let the face soak in water for a few hours so that it would bond better to the new plaster.
I then added the flashing and walls. I decided to again separate these into sections as it meant less use of silicone but also if one piece goes wrong it doesn't meant that the whole mould is faulty.
Here are some close ups of the left face and forehead sections
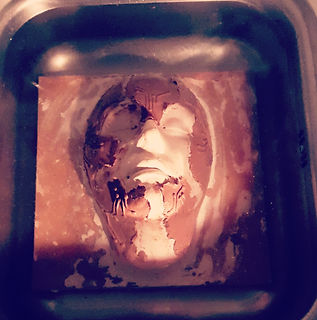
Image shows the face submerged in water. I had to sculpt into separate sections and with a tool go along under the thin edges , to help the clay lift off.
To help with the removal of the clay, a product called Float off or Scopas parting agent by Tiranti can be applied to the cast, then when ready, the whole head is placed under water and then the clay should lift up on its own. However i found that it creates a thin layer that can easily rip and remove when sculpting, especially when thinning the edges. So I had to be careful not to distort it too much.
Alluminium in drill.
Sculpting
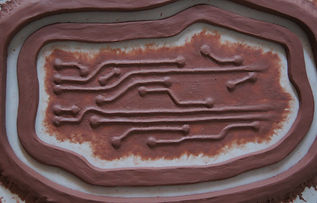
As I will be sculpting on the flatter areas of the face, it was more practical to create flat pieces rather than 2 part moulds of each area. I recreated the lines as shown in my design, however it was difficult to estimate where the hairline would be. In future I will mark this on by drawing a line on my model before the alginate is applied, and then it will transfer into the plaster. I decided after i had done the right section. that it might be safer to blend it in once it had been removed from the face just incase there are any problems that result in the difigurement of the sculpt.
Float off product
Sculpt on the face, lines have only been blended on the right side of the face.
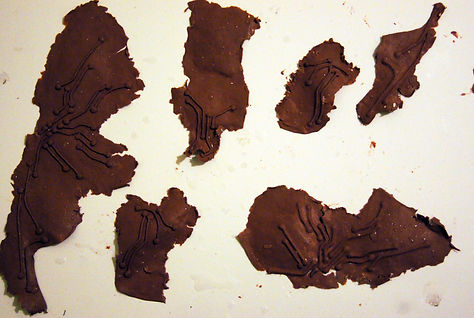
Here shows the floated off sections on a flat surface
I blended in the lines and thinner out the edges of each section. I went around each line rather than leaving areas that would be result in large areas of cap plastic. As this would allow less disolving of the cap plastic on the skin and hopefully produce less visiblity of edges.
I poured in equality parts A and B silicone. However I did not add and had to add more over the top but this resulted with the moulds being less smooth and even. This could effect the casting as it could lie uneven and effect the amount of silicone that is scraped off at particular sections.
Here shows the moulds after being removed, they came apart with ease with hardly any clay stuck in. The edges were clean and precise and did not require much neatening up. I feel that my mould making has improved and they are sculpted more precisely, which creates better quality outcomes and also more ease to clean up.
Here shows the mould outcome, it came apart with ease and there was hardly any clay stuck inside. The flashing and wall edges were neat and did not require much attention to. This is due the sculpt being more precise and even and therefore of better quality.